Feeds:
Posts
Comments

Blueballs & Rum Punch

My sister is getting married in less than two weeks, and this past Saturday I threw her bachelorette party.  I bought lots of silly things for the party, like a 5 foot tall blow up man and a penis ice cube tray!  While driving home one day I had the best idea ever – to freeze blueberries into the ball part of the penises to make little blueball penis icecubes!  It worked wonderfully.  Also, I made rum punch (sugar free!) and used a bundt pan to make a super cute ice block to keep the libation cold.

Here are some photos:

It seems counter-intuitive, but it’s easiest to fill the tray with ice FIRST, then place the berries. Also, I had to pick out all the smaller berries.

Such a big hit!

Delicious rum punch recipe to follow. For the ice block, place whatever fruit you want to freeze into the ice into the pan, then fill with an inch or two of water and freeze. Once the first part is frozen, fill the rest of the pan with ice and freeze into one big block.

Rum Punch Recipe

What you need:

  • 1/2 to 2/3 of a gallon (handle) of white rum, I used Bacardi
  • Two 2 liter bottles of Diet Sprite, 7-up, Sierra Mist, whatever
  • One packet of fruit punch crystal light

What to do:

  1. In a really, really big bowl (like seriously huge), mix the soda and crystal light powder together
  2. Pour in half a gallon of rum, taste, and see if you want more.  You should be able to taste it slightly.
  3. Mix very well, and serve!

Shrimp & Corn Chowder

This is REALLY good, you guys.  And pretty easy, too.  It was also a learning experience for me, because I didn’t know what the heck Old Bay Seasoning was, I just thought it was bay – glad I checked before putting a tablespoon of bay into the chowder!

What you need:

  • 2 tablespoons unsalted butter
  • 1 bunch scallions, thinly sliced (white and green parts separated)
  • 2 jalapenos, diced, save the seeds and add them as well, if you want a bit of spice.
  • 2 tablespoons all-purpose flour
  • 2 teaspoons Old Bay Seasoning (so I didn’t have this, so I just did a mix of the following, but it totaled to probably 2 tablespoons: a lot of Ground bay leaves, at least a teaspoon of celery salt, two pinches of paprika, garlic powder, crushed red pepper, allspice, nutmeg, ginger, salt, pepper)
  • 2 cups reduced-fat (2 percent) milk
  • 6 cups of chicken stock
  • 1 cup long-grain white rice
  • 3 cups corn kernels (from 3 ears corn)
  • 1 pound medium shrimp, peeled and deveined
  • Kosher salt and freshly ground pepper

What to do:

  1. Heat the butter in a large pot over medium-high heat. Add the scallion whites and jalapenos (seeds, too) and cook, stirring occasionally, until the vegetables are crisp-tender, about 4 minutes.
  2. Add the flour and Old Bay Seasoning and cook, stirring, until the flour is lightly toasted, about 1 minute.
  3. Add the milk, chicken stock and the rice. Bring to a rapid simmer, then reduce the heat to medium and cook until the rice is tender, about 15 minutes.
  4. Add the corn and shrimp.  Cook until the shrimp curl and turn opaque, about 3 minutes.
  5. Season the chowder with salt and pepper.  Ladle into bowls and top with the scallion greens.

Baked Rolled Tacos

This is a really great way to recreate rolled tacos at home, without the mess and added fat of frying.  It is a bit time intensive, but if you have a rolling partner, and you make a whole big batch, it’s worth it.

What you need:

  • Turkey/ chicken/ whatever meat you are using
  • onion
  • taco spice
  • garlic
  • 2 cups chicken broth for tortillas, 1 cup for browning meat
  • corn tortillas
  • olive or canola oil, spray
  • toothpicks

What to do:

  1. Preheat oven to 425
  2. Cook meat (if not already cooked).  For ground turkey meat, brown in a skillet w/ 1 cup chicken broth, diced onions, minced garlic and taco seasoning.  
  3. In another shallow skillet, simmer 2 cups chicken broth for 10 minutes
  4. Once the chicken broth is warm, dip tortillas in, 1-2 at a time, and let soak in broth for a few minutes.  Afterwards, the tortilla should be pliable enough to roll up without breaking.  Continue until all tortillas are done.  
  5. Spray olive or canola oil onto a baking sheet.
  6. Put 2-3 tablespoons of meat mixture onto each tortilla, then roll up tortilla.  Secure with a toothpick through the rolled taco.
  7. Place the rolled tacos onto sheet, and coat with oil spray.
  8. Bake for 15 minutes, or until crispy.

Just out of the oven

These babies are great when paired with tomatillo salsa and refried beans!  Enjoy!

Red Pepper Aioli

There is this burger place called Stacked where you build your own burger/ salad/ pizza/ pasta via an ipad at the table.  It’s a total novelty, but also the ingredients are legit and make for a great burger.  It was at Stacked where I discovered red pepper aioli.  You guys, I don’t really like bell peppers, and aioli sometimes grosses me out, depending on the consistency, but this red pepper aioli was the bomb.com.  I had to recreate it, and last night I finally did.  Excuse the lack of photos, but its a pretty simple recipe.

What you need:

  • 1/3 cup extra-virgin olive oil
  • 4 cloves garlic
  • Kosher salt and freshly ground pepper
  • 2 red bell peppers
  • 1/3 cup mayonnaise
  • 3 tablespoons fresh lemon juice

What to do:

  1. Cook garlic in a saucepan on medium high with olive oil, about 5 minutes.
  2. Place the red peppers directly on a stovetop gas burner over high heat and char on all sides, turning with tongs, about 10 minutes.
  3. Transfer to a bowl, cover with plastic wrap and set aside, 20 minutes. Peel the skin off the peppers with your fingers; discard the stems and seeds and chop.
  4. Make the aioli: Puree the roasted red peppers in a blender with the mayonnaise, garlic and oil, and 1 tablespoon lemon juice until smooth. Season with salt and pepper.

I got the aioli recipe from this Food Network Magazine recipe.  I just topped grilled chicken with the aioli and served with grilled veggies on the side.  It was DELICIOUS.  Also note that it made quite a bit of aioli… I have at least 8 ounces left.

I got the inspiration for this recipe (and most of the recipe from) Food Network Magazine: http://www.foodnetwork.com/recipes/food-network-kitchens/falafel-crusted-chicken-with-hummus-slaw-recipe/index.html

So apparently, you can buy boxed falafel mix.  It’s so cool!  It SMELLS just like falafel.  I did a little research and apparently this is the best brand (they have it at Henry’s/ Sprouts):

It was even on sale!

So the basic idea is to coat the chicken in falafel mix, bake it and stuff it into a wrap with delicious hummus coleslaw.  Just FYI, I double the recipe because I had two pounds of defrosted chicken, but the recipe is the original amounts.

What you need:

  • a pound or more of chicken breast tenders (or make your own from whole breasts)
  • olive oil
  • 1/2 cup falafel mix
  • 6 tablespoons of hummus
  • juice of one lemon
  • 1/2 teaspoon harissa or hot chili paste.  I used spicy paprika paste from Budapest:
  • 4 cups coleslaw mix or shredded cabbage
  • Salt
  • Tortillas or wraps

What to do:

  1. Preheat the oven to 425
  2. In a large bowl, toss the chicken with one tablespoon of olive oil
  3. Add the falafel mix to the bowl and coat the chicken pieces with the mix
  4. Put the chicken on a baking sheet (spray with oil first)
  5. Bake for about 10 minutes
  6. While the chicken is baking, make the coleslaw.  Mix the hummus, lemon juice, parprika/ chili paste and 3 tablespoons of water together in a large bowl.
  7. Add the cabbage/ coleslaw mix to the bowl, and mix until the cabbage is evenly coated with sauce.
  8. When the chicken is done, combine with slaw in a tortilla, then roll into a wrap, and eat up.

    Delicious!

Apple and Brie Quesadilla

Here is a quick snack recipe.  It would be a great after school snack, or even lunch for kids.  Apples and cheese are always such a great combo, and it works especially well in quesadilla form.

What you need:

  • 1-2 granny smith apples
  • olive oil
  • tortillas
  • brie, sliced as thin as you can get it
  • Optional: bacon, cook and cut up to put in the quesadilla

What to do:

  1. Slice the apple into really thin pieces.
  2. Add some olive oil to a skillet, heat over medium high heat, then add the apples.  Stir occasionally and cook for about 5 minutes or so, until the apples get tender.
  3. Arrange the cheese, apples (and bacon?) on a tortilla and top with another tortilla (or fold if you want a small portion)

    Ready to grill

  4. Grill the quesadilla in the skillet you already used for the apples until the brie is nice and gooey.  You’re done 🙂

Agua Fresca

I love strawberry agua fresca, you guys.  I love it to much, I want to marry it.  I go to the swapmeet in East County, just to get it.  Then I got the courage to ask the cashier at the tamale stand how to make it… What she told me was TOTALLY different than the recipes on line.  She said the secret ingredient is half and half.  The recipes online are always just fruit, sugar, ice, water.  I don’t buy half and half, and always have 2% milk, so I used that instead.  The result was SO GOOD.  Almost just like at the swapmeet, but no pants required.

P.S. Please do not mix up SALT for SUGAR in this recipe.  Trust me, it is the most disgusting thing you will taste all month, if you do.  #ilearnfrommymistakes :/

What you need:

  • 4 cups chopped/ hulled strawberries (about the amount you get from a small container from the store)
  • 2 cups of milk
  • 1/3 cup of sugar
  • 1 cup of water
  • blender

What to do:

  1. Add all the stuff to the blender… and puree! 
  2. Put the agua fresca in the fridge for at least an hour, 2-3 hours is preferred.  Don’t worry if the foam settles on top.
  3. Stir it up and enjoy, preferably in a warm, sunny spot. 

Refried Beans

I make these all the time, and never really though anything of it until Christina came over for pollo asado one night and was so in love with them.  I think she called them “restaurant beans”, haha.

I got the recipe from the mother of my best childhood friend.  She was a badass Mexicana who would always have some delicious Mexican food on the stove.  I loved going over there on enchilada night.  Anyway, it’s a very simple recipe that doesn’t require a lot of brain power (read: measurements) and makes a great side dish!

What you need:

  • Sun Vista pinto beans, what size can you want.  I usually use the 29 ouncer (the cheese amounts are based on this size can):
  • Cheese, shredded, about 2 cups.  Can be any of the following: cheddar, jack, mozzarella, cotija, queso fresco, anything similar.  I usually use whatever I happen to have on hand.
  • Parmesan cheese, shredded or grated, 1/2 cup or so.  This is key.  Romano should work, too.
  • Optional:
  • Minced garlic or onion
  • Taco seasoning
  • Chili paste, crushed red peppers, or anything else to make it a bit spicy
  • Potato masher, or some other way to smash the beans up

What you need to do:

  1. Pour the contents of the pinto bean can into a large skillet.  If you are adding any of the optional ingredients, add them now.
  2. Cook over medium high heat until the beans start to bubble.
  3. Simmer for 15 to 20 minutes, stirring occasionally… no worries because you can’t really over cook it.
  4. Smash a few beans with a spoon to see if they smash easily.  If they do, you are ready for step #5.
  5. Grab your potato masher (or other smashing tool, hah) and CAREFULLY smash all the little pintos up.  Seriously you gotta be careful because sometime you can create a suction when you smash the beans then pull the masher back up and then you end up with a beansplosion ALL over your kitchen… it’s VERY messy, ask Christina.  It’s not complicated, just try not to be an idiot like me.

    look at my fancy masher!

  6. Once the beans are homogenous, stir in the parmesan cheese.  And then stir in the other cheese.  Stir, stir, stir until it all melts.
  7. Enjoy 🙂

Lemon Chicken Orzo Soup

It was brought to my attention yesterday, during lunch at a delicious greek restaurant that my mom and sister have never had lemon chicken orzo soup (aka Avgolemono) and that I never posted about it!  I really, really like this soup, but I make it all the time because my BF LOOOOVES it.  It’s a very hearty soup, so it can definitely make a meal out of it, or pair it with a fresh, greek inspired salad.

Also, don’t be afraid to fudge things a bit… Adding more of things you like, etc.  I kind of just throw in what I have without measuring.

What you need:

  • 8 cups chicken broth
  • 1/2 cup fresh lemon juice
  • 1 cup shredded carrots (I usually end up just throwing in a whole pre-cut bag)
  • 1 cup chopped onion
  • chopped garlic
  • 2 tablespoons chicken soup base (found at Trader Joe’s, or two bullion cubes)
  • 1/4 teaspoon ground white pepper
  • 1/4 cup butter
  • 1/4 cup all-purpose flour (Wondra works best for this)
  • 1 – 2 cups orzo
  • 1 lb cooked chicken breast (I prefer coating the chicken in breadcrumbs, then baking them)
  • parsley to garnish
  • 6 eggs
  • olive oil

What to do:

  1. In a pot, sauté carrots, onion, garlic with olive oil for a few mins
  2. In the same pot, combine the chicken broth, lemon juice, carrots, onions, soup base, and white pepper. Bring to a boil on high, then simmer for 20 minutes.
  3. Add uncooked orzo
  4. Blend the butter and the flour together. Then gradually add it to the soup mixture. Simmer for 10 minutes more, stirring frequently.
  5. Meanwhile, beat the egg until light in mixed. Gradually add the eggs to the hot soup, stirring constantly. Simmer for another 10 – 15 minutes.
  6. Mix in the chicken pieces.
  7. Ladle hot soup into bowls and garnish with lemon slices and parsley.

So I don’t remember how I stumbled upon Pati’s Mexican Table blog, but you should definitely check it out.  I used her recipe for the enchiladas and the tomatillo salsa in this post.  The enchiladas are kind of a PITA, but they were delicioussssss.  The salsa, on the other hand was easy and I am in love with it.  I want to make it every week, now.  Also, I love going to the mexican market, Pancho Villa to get cheaper, fresher ingredients for stuff like this.  Check out this huge hunk of queso fresco I got for less than $4!

Anyway, I will separate the two recipes so you can make one or the other easier, if you wish.

Tomatillo Salsa

What you need

  • Two pounds green tomatillos, husked and rinsed
  • 2-5 garlic cloves, to your taste
  • 2 serrano or jalapeno chiles (I accidentally bought anaheim, wah)
  • 1-2 cups cilantro leaves
  • 1/4 – 1/2 cup chopped white onion
  • 1 teaspoon sea salt
  • 1 tablespoon vegetable, canola oil

What to do:

  1. Put the tomatillos and garlic into a large stockpot.  Cover with water and bring to a boil. 
  2. Simmer for about 10 minutes, or until the tomatillos change color to pale green.
  3. Put the tomatillos, garlic and 1/2 cup of the cooking water into a blender.  Puree and then add the onions, cilantro, salt and chiles.  Puree until the salsa is mixed throughout. 
  4. In the same stockpot, heat a tablespoon of oil, and add the salsa back into the pot.
  5. Simmer the salsa for another 10 minutes or so, until it thickens up a bit.  Add more salt to taste.
  6. Enjoy!

Enchiladas Verdes

What you need:

  • 2 pounds of chicken breast
  • a few cups of chicken stock
  • oil
  • 12-14 corn tortillas
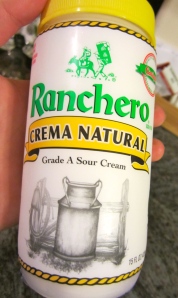
  • 1/2 cup mexican style crema Brand doesn't matter, but this one is great
  • queso fresco
  • a generous amount of tomatillo salsa, at least 4 cups

What to do:

  1. Add the uncooked chicken and the chicken stock to a slow cooker and cook on low for 7-8 hours
  2. Preheat the oven to 375 degrees
  3. In a saute pan or cast iron skillet, add enough oil to cover a tortilla lying flat in the pan.  Preheat the pan on low for 5 mins for a normal pan or 10-15 for cast iron.
  4. Let 2-3 tortillas soak in the oil for a minute or two, then take them out, let the oil drain, and repeat until with the remaining tortillas.  You will be able to tell when they are ready because they will become WAY more pliable, and won’t break when rolled up.  The first time around, I didn’t soak them long enough and ended up with a bunch of broken enchiladas… Don’t repeat my mistake!
  5. Fill each tortilla with a 3 tablespoons of chicken and some queso fresco
  6. Roll up the tortilla around the chicken and queso, seam facing down, and place into oven safe dish
  7. Cover generously with tomatillo salsa
  8. Bake for about 20 minutes
  9. Serve with queso fresco and crema on top on the enchiladas.  Enjoy them while they are hot!