Feeds:
Posts
Comments

Archive for the ‘Chicken’ Category

I got the inspiration for this recipe (and most of the recipe from) Food Network Magazine: http://www.foodnetwork.com/recipes/food-network-kitchens/falafel-crusted-chicken-with-hummus-slaw-recipe/index.html

So apparently, you can buy boxed falafel mix.  It’s so cool!  It SMELLS just like falafel.  I did a little research and apparently this is the best brand (they have it at Henry’s/ Sprouts):

It was even on sale!

So the basic idea is to coat the chicken in falafel mix, bake it and stuff it into a wrap with delicious hummus coleslaw.  Just FYI, I double the recipe because I had two pounds of defrosted chicken, but the recipe is the original amounts.

What you need:

  • a pound or more of chicken breast tenders (or make your own from whole breasts)
  • olive oil
  • 1/2 cup falafel mix
  • 6 tablespoons of hummus
  • juice of one lemon
  • 1/2 teaspoon harissa or hot chili paste.  I used spicy paprika paste from Budapest:
  • 4 cups coleslaw mix or shredded cabbage
  • Salt
  • Tortillas or wraps

What to do:

  1. Preheat the oven to 425
  2. In a large bowl, toss the chicken with one tablespoon of olive oil
  3. Add the falafel mix to the bowl and coat the chicken pieces with the mix
  4. Put the chicken on a baking sheet (spray with oil first)
  5. Bake for about 10 minutes
  6. While the chicken is baking, make the coleslaw.  Mix the hummus, lemon juice, parprika/ chili paste and 3 tablespoons of water together in a large bowl.
  7. Add the cabbage/ coleslaw mix to the bowl, and mix until the cabbage is evenly coated with sauce.
  8. When the chicken is done, combine with slaw in a tortilla, then roll into a wrap, and eat up.

    Delicious!

Read Full Post »

Lemon Chicken Orzo Soup

It was brought to my attention yesterday, during lunch at a delicious greek restaurant that my mom and sister have never had lemon chicken orzo soup (aka Avgolemono) and that I never posted about it!  I really, really like this soup, but I make it all the time because my BF LOOOOVES it.  It’s a very hearty soup, so it can definitely make a meal out of it, or pair it with a fresh, greek inspired salad.

Also, don’t be afraid to fudge things a bit… Adding more of things you like, etc.  I kind of just throw in what I have without measuring.

What you need:

  • 8 cups chicken broth
  • 1/2 cup fresh lemon juice
  • 1 cup shredded carrots (I usually end up just throwing in a whole pre-cut bag)
  • 1 cup chopped onion
  • chopped garlic
  • 2 tablespoons chicken soup base (found at Trader Joe’s, or two bullion cubes)
  • 1/4 teaspoon ground white pepper
  • 1/4 cup butter
  • 1/4 cup all-purpose flour (Wondra works best for this)
  • 1 – 2 cups orzo
  • 1 lb cooked chicken breast (I prefer coating the chicken in breadcrumbs, then baking them)
  • parsley to garnish
  • 6 eggs
  • olive oil

What to do:

  1. In a pot, sauté carrots, onion, garlic with olive oil for a few mins
  2. In the same pot, combine the chicken broth, lemon juice, carrots, onions, soup base, and white pepper. Bring to a boil on high, then simmer for 20 minutes.
  3. Add uncooked orzo
  4. Blend the butter and the flour together. Then gradually add it to the soup mixture. Simmer for 10 minutes more, stirring frequently.
  5. Meanwhile, beat the egg until light in mixed. Gradually add the eggs to the hot soup, stirring constantly. Simmer for another 10 – 15 minutes.
  6. Mix in the chicken pieces.
  7. Ladle hot soup into bowls and garnish with lemon slices and parsley.

Read Full Post »

So I don’t remember how I stumbled upon Pati’s Mexican Table blog, but you should definitely check it out.  I used her recipe for the enchiladas and the tomatillo salsa in this post.  The enchiladas are kind of a PITA, but they were delicioussssss.  The salsa, on the other hand was easy and I am in love with it.  I want to make it every week, now.  Also, I love going to the mexican market, Pancho Villa to get cheaper, fresher ingredients for stuff like this.  Check out this huge hunk of queso fresco I got for less than $4!

Anyway, I will separate the two recipes so you can make one or the other easier, if you wish.

Tomatillo Salsa

What you need

  • Two pounds green tomatillos, husked and rinsed
  • 2-5 garlic cloves, to your taste
  • 2 serrano or jalapeno chiles (I accidentally bought anaheim, wah)
  • 1-2 cups cilantro leaves
  • 1/4 – 1/2 cup chopped white onion
  • 1 teaspoon sea salt
  • 1 tablespoon vegetable, canola oil

What to do:

  1. Put the tomatillos and garlic into a large stockpot.  Cover with water and bring to a boil. 
  2. Simmer for about 10 minutes, or until the tomatillos change color to pale green.
  3. Put the tomatillos, garlic and 1/2 cup of the cooking water into a blender.  Puree and then add the onions, cilantro, salt and chiles.  Puree until the salsa is mixed throughout. 
  4. In the same stockpot, heat a tablespoon of oil, and add the salsa back into the pot.
  5. Simmer the salsa for another 10 minutes or so, until it thickens up a bit.  Add more salt to taste.
  6. Enjoy!

Enchiladas Verdes

What you need:

  • 2 pounds of chicken breast
  • a few cups of chicken stock
  • oil
  • 12-14 corn tortillas
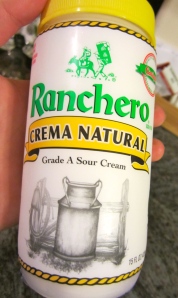
  • 1/2 cup mexican style crema Brand doesn't matter, but this one is great
  • queso fresco
  • a generous amount of tomatillo salsa, at least 4 cups

What to do:

  1. Add the uncooked chicken and the chicken stock to a slow cooker and cook on low for 7-8 hours
  2. Preheat the oven to 375 degrees
  3. In a saute pan or cast iron skillet, add enough oil to cover a tortilla lying flat in the pan.  Preheat the pan on low for 5 mins for a normal pan or 10-15 for cast iron.
  4. Let 2-3 tortillas soak in the oil for a minute or two, then take them out, let the oil drain, and repeat until with the remaining tortillas.  You will be able to tell when they are ready because they will become WAY more pliable, and won’t break when rolled up.  The first time around, I didn’t soak them long enough and ended up with a bunch of broken enchiladas… Don’t repeat my mistake!
  5. Fill each tortilla with a 3 tablespoons of chicken and some queso fresco
  6. Roll up the tortilla around the chicken and queso, seam facing down, and place into oven safe dish
  7. Cover generously with tomatillo salsa
  8. Bake for about 20 minutes
  9. Serve with queso fresco and crema on top on the enchiladas.  Enjoy them while they are hot!

Read Full Post »

I sincerely apologize for being so absent lately, but I will make it up by posting TWO times today. First off, roast bone in chicken w/ veggies.  Very easy, and very delicious.  I hadn’t ever roast any bone in chicken before, but I had some leftover bone in breasts in the freezer after my disaster trying to make fried chicken (seriously, it was a disaster).  So I googled ways to prepare bone in chicken and came across this post .  I tweaked it very slighlty and it turned out REALLY great.  Here’s how to do it:

What you need:

  • 2 skin on, bone in chicken breasts (or any skin on, bone in chicken parts would work, I’m sure)
  • 1 lemon, sliced (more lemons if you are making more than 2-3 pieces of chicken)
  • 1 teaspoon of salt
  • 2 tablespoons of fresh thyme
  • Garlic; I probably used 6-7 cloves of garlic, already minced
  • Black pepper and salt
  • Olive oil for drizzling
  • 1-2 tablespoons butter (optional)
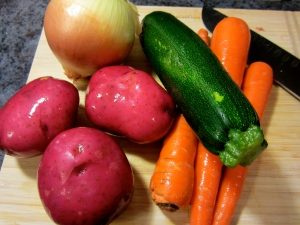
  • Whatever veggies you want to roast (carrots, potatoes, butternut squash, onions are all great for roasting)

What to do:

  1. Preheat the oven to 400
  2. Clean and chop the veggies.  Spread out on a baking sheet or in a roasting pan.

    Look at these gorgeous colors!

  3. Drizzle veggies with olive oil and sprinkle generously with S&P.
  4. Get out a cutting board and a muddler (if you have it, if not a knife will do).  If the garlic and thyme aren’t already chopped up/ minced, do that now.

    Ready to combine

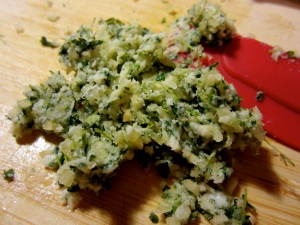
  5. Muddle the salt, garlic, thyme and butter together to make a paste.

    Paste

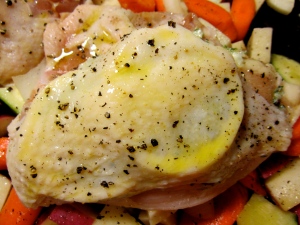
  6. Pull back the skin on the chicken and rub half the paste on each breast, under skin.  Then stuff with the sliced lemons.
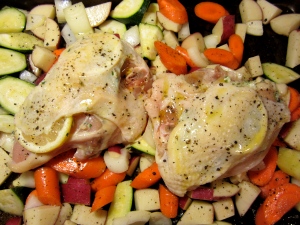
  7. Place chicken breasts on top of bed of veggies and drizzle olive oil onto chicken.  Top with S&P.
  8. Pop it all into the oven for about 25 minutes.  Be sure to let the meat rest for a few minutes after it comes out of the oven, as always.
  9. Enjoy!

Read Full Post »

I saw a recipe in Real Simple a few months ago for buffalo chicken sandwiches and jotted it down on my list of things to try out.  I was feeling lazy and decided to take a crock pot route instead of following the RS recipe.  I found this one on allrecipes.com, which I followed for the most part: http://allrecipes.com//Recipe/slow-cooker-buffalo-chicken-sandwiches/Detail.aspx

Basically, all you need are the following: crockpot, chicken breast (I used chicken breast tenders), hot sauce or buffalo sauce (I used Frank’s Buffalo Sauce), a few tablespoons of butter, some ranch dressing mix (I used Hidden Valley Buttermilk Ranch), and some kind of bun/ roll to put it on.

Put the chicken in the crockpot, along with the sauce (I used a whole 12 ounce bottle), the butter, the ranch mix (I used about 1.5 packets, or tablespoons).  My chicken was frozen, but I knew it wouldn’t be dinner time in 7 hours, so I still kept it all the way down on the lowest setting… my old ass crockpot is older than me and has no fancy timers, etc.  So it was on low from about 10:30am – 5:30pm, then I turned it off, then turned it back on around 7 to eat at 7:30pm.  I didn’t end up shredding the chicken, because I didn’t want to lose it in the sauce.  I had tenders anyway, not huge breasts, so it worked out.

To top the sandwiches off, I shredded some green cabbage and mixed it with some homemade bleu cheese dressing (to follow).  It was totally delicious, especially with a side of fresh, sweet corn on the cob.  Beware though, we used regular hamburger buns, which proved to be no match for the dressing + hot sauce.  Assemble your sammy, then eat IMMEDIATELY.  It is superrrr messy!  I think next time I am going to try using a tortilla and making it more like a burrito/ wrap, simply to contain the sauces more effectively.  All in all, it was big (and easy!) hit for a quick spring dinner.  I think kids would love this, and it’s not too spicy (with the sauce I used) if you don’t shred the chicken or add more sauce after the fact, as the OG recipe calls for.  In fact, for me, it was tame.

Oh and P.S. the nutrition facts on the allrecipes recipe is WAY off, by my calculation at least.  I got about 420 cals per sandwich (including cabbage and 2 tbsp bleu cheese dressing) with a hamburger bun that was 150cals.

Bleu Cheese Dressing:

Over the Christmas holiday in 2009, my BF and I went to San Francisco, for a mini-vacay.  SO MUCH GOOD FOOD!  One bar we went to, the name of which I can’t remember for the life of me, had delicious beer and even more delicious pub fare.  The best things we had were the bleu cheese dressing and this crazy roasted broccoli, which had the most interesting and unexpected texture (which I have never been ever to replicate, sadly).  I was raving to the server about the bleu cheese and he came back with the recipe!  Their recipe was as follows:  equal parts sour cream and mayonnaise, gorgonzola cheese, and then sauteed scallions which have then been pureed.

I randomly had all the ingredients on hand (random because we are not fans of sour cream or mayo).  I didn’t measure anything out, just eyeballed it, mayo + sour cream + bleu cheese + some of the leftover HV buttermilk powder.  I sauteed the scallions in garlic olive oil (AMAZING) and tried pureeing it in my mini food processor.  This didn’t work out too well.  It was actually pretty gross, so I just chucked it.  I must say though, it was delicious!  I will definitely be making this more often!

Read Full Post »

Holy crap, I made a stir fry dish that didn’t suck (not including fried rice)!!!

Five or six years ago, while simultaneously being so excited and so overwhelmed at IKEA, I stumbled upon a wok.  FOR $5!  So crazy!  I had to buy it.  I was so excited about my new smart purchase that I stir fried my heart out.  Veggies, rice, frozen meals from TJ’s, you name it.  It was glorious.  But I never attempted any real Asian dishes, if you will, I just made stuff up.  Fast forward to three months ago when I started receiving Food Network Magazine with the occasional, deceivingly delicious looking Asian stir fry recipe.  Out of the dozens of recipes from FNM I have tried, the three wok recipes I tried were the only three I disliked.  They all were soupy and gross, SUCH a disappointment… especially coming from my beloved FMN.

Last week, while browsing Ranch 99, I forgot my recent wok adventures, and bought some chow mein noodles.  Then I got home and realized what I had done.  Fourth time’s a charm?  I searched allrecipes.com and foodnetwork.com for recipes.  As I usually do, I picked out parts I liked from some recipes and mushed them all together to make my own.  And by golly, I was victorious!!  It was really delicious, and EASY, yay!  I apologize for lack of pictures, I was too busy sleeping off a chow mein food coma to worry about such details.

Ingredients

  • 1 pound chow mein noodles, cooked according to the package (mine said to boil for about a minute, then drain)
  • 1 – 2 pounds of cut up chicken pieces (I used one pound, and it worked, but 2 would be better, also some stores have already cut up stir fry pieces!)
  • 5 – 6 tablespoons toasted sesame oil (you can use veggie, or olive, but the sesame really adds to the taste!)
  • 1 (2-inch) piece fresh ginger peeled and minced (food processor really helps)
  • 5 – 6 garlic cloves, minced (if you already have the food processor out…)
  • 2 – 4 green onions, thinly sliced
  • 3 large carrots, peeled, trimmed and cut into matchstick-size pieces
  • 1 or 2 heads of broccoli, broken down into florets
  • about ½ head of cabbage (I used regular ol’ green), sliced up into strips approximately ½ inch wide
  • 1 (8-ounce) can baby corn, rinsed and drained
  • 1 cup chicken broth
  • ¾ cup hoisin sauce
  • ¼ cup soy sauce

Obviously you can add whatever other veggies you like; mushrooms, bok choy, snap peas, etc.

PS You will need a really big wok!  Or cut the recipe down if you don’t have a whole family to feed/ don’t like leftovers.

Directions

  1. Boil the chow mein noodles as necessary, no more than a min or two, drain
  2. In your super cool wok, heat the oil over high heat.
  3. Add the ginger, garlic and carrots. Cook for a few minutes.
  4. Add the noodles and chicken!  And cook some more, maybe another 3 minutes, constantly stirring
  5. Add all other veggies.
  6. Add the broth, hoisin, soy sauce.  Continue cooking and stirring until all the veggies and most importantly chicken are cooked.  Keep the sauces handy in case you need more to add in as you are cooking.
  7. Garnish with the green onions and eat your delicious meal!

Read Full Post »
Fettuccine Alfredo

Last night I made Fettuccine Alfredo… for the first time ever, which is weird, because I LOOOOOVE it.  The reason I never made it is that it’s sooo bad for you, I reserved it for a treat at a good Italian restaurant.  Then I found this amazing (believe me) recipe for this low-cal FA that honestly tastes like the real thing.

Recipe (adapted from Food Network Magazine, link)

Ingredients

  • 1 tablespoon unsalted butter
  • 5 – 6 clove garlic, minced
  • grated lemon zest from one lemon
  • 2 – 3 teaspoons all-purpose flour (Wondra brand works the best for this, and any other sauces, gravies, etc)
  • 1 cup low-fat (2%) milk
  • salt
  • 2 tablespoons low-fat cream cheese
  • 3/4 cup grated parmesan or romano cheese, plus more for topping
  • 2 – 3 tablespoons chopped fresh parsley
  • 1 package of fettuccine pasta, or fresh if you have it!


Directions

1.     Cook the pasta, according to the directions

2.     For the sauce: melt butter, lemon zest and garlic in a sauce pan over medium heat.  Cook for a minute or two, until garlic starts to soften

3.     Add flour, whisk for a minute

4.     Whisk in milk and ¾ teaspoon of salt, for 3-5 minutes until thickened

5.     Whisk in cream and parmesan/ romano cheeses until melted

6.     Add and stir in chopped parsley

7.     Serve over plated pasta

Per serving: Calories 490; Fat 15 g (Saturated 8 g); Cholesterol 48 mg; Sodium 734 mg; Carbohydrate 66 g; Fiber 3 g; Protein 20 g****

*Please note that this is approximate, as I did change the recipe slightly, although based on the changes, I don’t think the nutrition facts are altered much at all.

I also served the pasta with roasted asparagus (simply roast asparagus with some olive oil and salt and pepper for 10-20 mins in the oven) and some grilled chicken breast that I marinated with balsamic vinaigrette.  So delish!

Read Full Post »
Lasagna

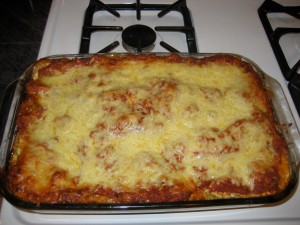
One of the BF’s fav foods is lasagna.  I’m not a huge, huge fan, but I thought I’d be a good little house girlfriend and make some for him.  I got the following recipe from a friend (thanks Steph!):

Ingredients

  • 1 pound sweet Italian sausage
  • 3/4 pound lean ground beef
  • 1/2 cup minced onion
  • 2 cloves garlic, crushed
  • 1 (28 ounce) can crushed tomatoes
  • 2 (6 ounce) cans tomato paste
  • 2 (6.5 ounce) cans canned tomato sauce
  • 1/2 cup water
  • 2 tablespoons white sugar
  • fresh basil, approx ½ cup or so
  • 1 teaspoon Italian seasoning
  • 1/4 teaspoon ground black pepper
  • 4 tablespoons chopped fresh parsley
  • 16 ounces ricotta cheese
  • 1 egg
  • 1/2 teaspoon salt
  • 12 lasagna noodles
  • 3/4 pound mozzarella cheese, sliced
  • 3/4 cup grated Parmesan cheese

Directions

  1. In a Dutch oven, cook sausage, ground beef, onion, and garlic over medium heat until well browned.
  2. Stir in crushed tomatoes, tomato paste, tomato sauce, and water.
  3. Season with sugar, basil, Italian seasoning, 1tablespoon pepper, and 2 tablespoons parsley.
  4. Simmer, covered, for about 1 1/2 hours, stirring occasionally.
  5. Soak raw, hard noodles in a large bowl of very hot tap water for 10-15 min
  6. In a mixing bowl, combine ricotta cheese with egg, remaining parsley, and 1/2 teaspoon salt.
  7. Preheat oven to 375 degrees F (190 degrees C).
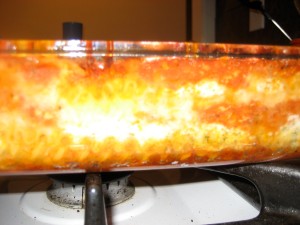
  8. To assemble, spread 1 1/2 cups of meat sauce in the bottom of a 9×13 inch baking dish. Arrange 6 noodles lengthwise over meat sauce. Spread with one half of the ricotta cheese mixture. Top with a third of mozzarella cheese slices. Spoon 1 1/2 cups meat sauce over mozzarella, and sprinkle with 1/4 cup Parmesan cheese. Repeat layers, and top with remaining mozzarella and Parmesan cheese. Cover with foil: to prevent sticking, either spray foil with cooking spray, or make sure the foil does not touch the cheese.
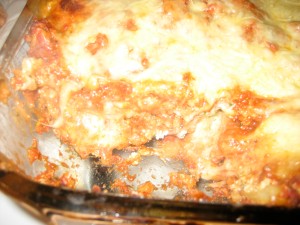
  9. Bake in preheated oven for 25 minutes. Remove foil, and bake an additional 25 minutes. Cool for 15 minutes before serving

Changes I made (or will in the future):

More ricotta!

I used ground turkey and chicken Italian sausage because I don’t eat beef.

I didn’t use a dutch oven, just a huge saucepot.

I simmered the sauce for probably 3 hours or so, the longer the better!

I made the sauce and assembled the lasagna then stuck in the fridge for a day or two, then baked it.  This is definitely a weekend meal to prepare.

Next time I think I will double the sauce recipe because it is a bit labor intensive, but totally freezable.  Why not do the same about of work and just freeze some for pasta or another batch of lasagna?!

Other than that, shit was delish.  Even I liked it, A LOT.  My BF LOVED it.  I think if the lasagna could be impregnated and make a bunch of little baby lasagnas, he might leave me for it.

Read Full Post »
Chicken “steak”

There is this Filipino dish I absolutely love (beefsteak) but since I gave up beef years ago (personal reasons), I haven’t had it since and that kinda sucks. Fortunately, I found some thinly sliced chicken breasts in Chinatown. I mean RICE PAPER thin.

I marinated the chicken for a day by the way:

  • Soy sauce
  • Freshly squeezed lemon juice
  • Sesame oil
  • Minced garlic
  • Sliced onions
  • Pepper

I cooked EVERYTHING in a pan at the same time. Serve with steamed rice.

$ breakdown:

  • $2 for a pack of the thinly sliced chicken

PS – a link to the Filipino beefsteak recipe – http://pinoycook.net/bistek-filipino-beef-steak/

Read Full Post »

I cheated. I bought marinated chicken from an Asian market this past weekend. I HATE using anything prepackaged so I’m not too sure why I caved in and bought this chicken.

I was craving something similar to what I’ve had at Korean fast food places and I figured it shouldn’t be too difficult to make (especially since I already had the marinated spicy chicken).

  • Slivered onions
  • Minced garlic
  • Sliced mushrooms
  • A few pieces of baby bok choy (separated)

Heat some sesame oil in a pot over medium-high heat and toss in the garlic and the chicken. After about 2 minutes, turn the chicken over, put the rest of the ingredients in and cover the pot with a lid. Because the mushrooms and bok choy release a lot of water (also combined with the covered pot), the chicken will cook through and you’ll have a bit of a sauce from the marinade. You can choose to make this sauce thicker by adding a bit more broth or water & some cornstarch/flour, or you can leave it as is.

It won’t take long to cook, btw, maybe about 8-10 minutes. In the meantime, you can boil water and cook the vermicelli noodles. I mixed them with sesame oil and some hoisin sauce after they were cooked and strained.

$ breakdown:

  • $4 marinated chicken from the Asian grocery store (I got it from M2M in the east village but I’m sure it would’ve been cheaper if I went to Koreatown or Chinatown)
  • $2 bok choy
  • $2 vermicelli

Read Full Post »
Older Posts »