Feeds:
Posts
Comments

Archive for the ‘Vegetables’ Category

This is REALLY good, you guys.  And pretty easy, too.  It was also a learning experience for me, because I didn’t know what the heck Old Bay Seasoning was, I just thought it was bay – glad I checked before putting a tablespoon of bay into the chowder!

What you need:

  • 2 tablespoons unsalted butter
  • 1 bunch scallions, thinly sliced (white and green parts separated)
  • 2 jalapenos, diced, save the seeds and add them as well, if you want a bit of spice.
  • 2 tablespoons all-purpose flour
  • 2 teaspoons Old Bay Seasoning (so I didn’t have this, so I just did a mix of the following, but it totaled to probably 2 tablespoons: a lot of Ground bay leaves, at least a teaspoon of celery salt, two pinches of paprika, garlic powder, crushed red pepper, allspice, nutmeg, ginger, salt, pepper)
  • 2 cups reduced-fat (2 percent) milk
  • 6 cups of chicken stock
  • 1 cup long-grain white rice
  • 3 cups corn kernels (from 3 ears corn)
  • 1 pound medium shrimp, peeled and deveined
  • Kosher salt and freshly ground pepper

What to do:

  1. Heat the butter in a large pot over medium-high heat. Add the scallion whites and jalapenos (seeds, too) and cook, stirring occasionally, until the vegetables are crisp-tender, about 4 minutes.
  2. Add the flour and Old Bay Seasoning and cook, stirring, until the flour is lightly toasted, about 1 minute.
  3. Add the milk, chicken stock and the rice. Bring to a rapid simmer, then reduce the heat to medium and cook until the rice is tender, about 15 minutes.
  4. Add the corn and shrimp.  Cook until the shrimp curl and turn opaque, about 3 minutes.
  5. Season the chowder with salt and pepper.  Ladle into bowls and top with the scallion greens.

Read Full Post »

One thing you may or may not know about me… I am obsessed with finding good deals and then stocking up in the freezer.  I dream about the future, when I will have a garage and can buy one of those huge freezers.  Please don’t judge me.

Anyway, I bring this up because around Thanksgiving I bought turkey breasts (the whole bone-in breast, basically the turkey w/o legs and wings, not just boneless, skinless breasts) for 99 cents a pound – which is CRAZY cheap.  So obviously I bought three, two of which I was not planning on using for Thanksgiving.  After a particularly robust trip to Costco, I had to free up some freezer space and I finally made one of the breasts… IN A CROCKPOT.

SO EASY and SO DELICIOUS.  Do it, you will thank me, later.

What you need:

  • Full bone in turkey breast (make sure it will fit in your crock pot, first!), defrosted
  • 1 packet of dry onion soup mix
  • minced garlic
  • two onions, chopped
  • one bunch of celery, chopped
  • a few red potatoes, chopped
  • carrots, I used a bag of baby carrots
  • 1/4 cup chicken broth or white wine (or half and half)
  • 1 stick of butter, softened, mixed with oregano, sage, thyme, rosemary

mmm veggies

What to do:

  1. Put the breast into the crock pot dish.  Prepare the bird by lifting as much of the skin off as you can, then rubbing the butter & herb mix into the meat.  Cover back up with the skin.  Kind of gruesome, but so worth it.

    Boyfriend giving the bird a butter rub down

  2. Fill the crock pot around the bird with half to two thirds of the veggies.  Stuff the remainder inside the cavity.

    This is post-cook, but you can see how the veggies are around, and stuffed inside

  3. Mix the soup packet with the wine/ stock, and add to the crock pot.
  4. Cook on low for about 7 hours
  5. Don’t worry about the lack of liquid!  While it cooks, it will let out all the juices, as you can see in the photo above.

finished product

with stew on the side!

This is seriously the easiest and most tender turkey I have ever made/ had.  We usually fry turkey for the holidays, which is awesome, but a huge PITA.  This is so easy, and it literally falls apart when touched.

P.S. you don’t have to use the veggies, but it so easy, and in the end you have an entire one pot meal waiting for you.

Read Full Post »

Stuffed Mushrooms

I got this quick, cheap and easy recipe from one of my good friends, Stuph!  It’s a great to serve as an appetizer.

What you need:

  • Stuffing Mushrooms, one or two packs
  • A few cloves of garlic
  • One onion
  • Olive oil
  • Bread crumbs, about 1/2 cup
  • Parmesan cheese, about 1/2 cup, or more

What to do:

  1. Cut the stems out of the mushrooms in a circular motion and save the stem
  2. Mince the stems along with a clove or two of garlic and some onion, easiest in a food processor
  3. Put a little olive oil in a frying pan and cook the mushroom stems/garlic/onions for a few minutes
  4. Turn off the heat and add the bread crumbs and parmesan cheese, and mix well.
  5. Put a spoonful or more in each mushroom.
  6. Bake stuffed mushrooms in the oven for about 10-15 minutes or until the mushroom is cooked.

Do ahead: you can prepare the mushrooms fully, and then pop in the oven right before serving

Read Full Post »

Butternut squash was crazy on sale about a month ago at Sprouts/ Henry’s, so I did the rational thing and bought like seven of them.  Luckily I came across this recipe in Martha Stewart Living for butternut squash lasagna.  It really is perfect because Boyfriend loves lasagna (but I rarely make it because it takes about 6 hours) and I have all these squash to use!  I followed the recipe for the most part, but did make some minor changes based on laziness.

What you need:

  • One butternut squash, about 3-4 lbs
  • Olive oil
  • Salt & pepper
  • At least one pound ricotta cheese
  • 1/2 cup heavy cream
  • 2 eggs
  • 2-3 cups of grated mozzarella
  • A tablespoon or two of nutmeg
  • minced garlic, to taste (I used about a tablespoon, maybe a bit more)
  • 3 tablespoons butter
  • 1/3 cup loosely packed sage leaves, chopped
  • 1 1/4 cups chicken stock
  • Lasagna noodles
  • Parmesan cheese to sprinkle on top

What to do:

  1. Preheat oven to 425.  Peel and cut up the squash into one inch pieces.
  2. Toss or spray with olive oil.  Sprinkle with pepper.  Spread out on a baking sheet and bake for 25 minutes.
  3. Reduce oven to 375.
  4. Combine ricotta, eggs, cream, mozzarella, nutmeg, garlic and a pinch or two of salt.

    Cheesy mixture

  5. When the squash is done roasting, or has a few minutes left, melt the butter in a large sauce pan.  When the butter is fully melted, add the chopped sage.  Stirring constantly, cook the sage & butter over medium heat until the butter becomes very yellow, about 4-5 minutes.

    Not quite yellow enough yet

  6. If you have a sous-chef, like I happen to last night, have them do this step while you are working on the sage & butter.  Soak about half a pack of uncooked lasagna noodles in hot tap water in a shallow dish.  After 3-4 minutes take them out of the water.  They should still be pretty stiff.
  7. Add the squash and chicken stock to the sauce pan with the sage and butter.  Mash most of the squash and stir thoroughly.
  8. Assemble the lasagna in a 9×13 baking dish, in this order: Layer of noodles, layer of butternut squash (about 1/3 to half of the mixture depending on how many layers you want), layer of cheese mixture.  Repeat until you run out of squash and cheese.  Top the entire thing with a generous layer of Parmesan cheese.

    Bad representation of the layers

  9. Bake for 35 minutes.  Let stand for at least 10 minutes before serving, unless you want to burn your face off. 

    Delicious!

    The end result was very good, perfect for a chilly night.  It was WAY less time consuming that normal lasagna (if you make your own sauce, as I do), so it’s much more appropriate for a weeknight dinner.

Read Full Post »

PUMPKINS!!!  I have wanted to cook with pumpkins for years, but I could never find the right kind of pumpkins.  You can’t just use jack o lantern ones, because they don’t taste good, don’t have much meat and are watery and yucky.  But this year it seems that all my local grocers finally got with it.  There are sugar pumpkins everywhere!  I am still on the search for a cheese pumpkin, though…

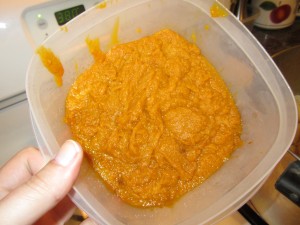
I was perusing the interwebs, looking for a cool recipe to try out and stumbled upon this one, which I adapted for this dish.  Also, ricotta was on sale at Sprouts, so it was perfect.  I actually roasted my own pumpkin and made the puree the day before.  You can google instructions on how to roast a pumpkin, but it’s basically exactly like roasting a spaghetti squash, only without the salt and pepper.  I roasted two 2-3lb sugar pumpkins and it made double the amount needed for this recipe (popped the rest in the freezer for later).

pumpkin puree!

What you need:

  • 16 ounces of whatever type of pasta you prefer (although shorter noodles like penne or bowtie are better)
  • 4 – 6 cups of ricotta
  • 15 ounces or about 2 cups of pumpkin puree
  • 2 eggs
  • 6 ounces yogurt
  • 2 teaspoons of salt
  • 1 teaspoon nutmeg
  • 1/2 teaspoon ginger
  • 1 or 2 tablespoons Italian seasoning
  • 2 tablespoons minced garlic (about a bulb)
  • 3/4 – 1 cup slivered almonds
  • 3/4 cup grated parmesan
  • 1 cup of mozzarella or a few ounces of heavy cream
  • About 1/2 a cup of breadcrumbs
  • Olive oil
  • Ground pepper

What to do:

  1. Preheat the oven to 375 and lightly oil a 9×13 baking dish or pan.
  2. Cook the pasta VERY al dente, and drain.  Add back into the pot and toss with a bit of olive oil to keep it from sticking.
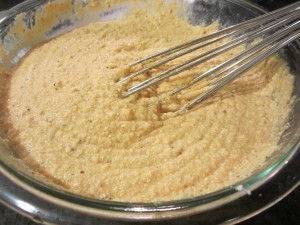
  3. In a larger bowl whisk the following together; ricotta, mozzarella, pumpkin puree, eggs & yogurt.
  4. Add the salt, nutmeg, pepper, ginger, italian seasoning, garlic, parmesan and almonds and stir until combined.
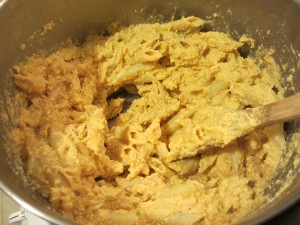
  5. Add contents of bowl to pasta pot and stir into pasta until thoroughly mixed.  
  6. Pour mixture into prepared baking dish.
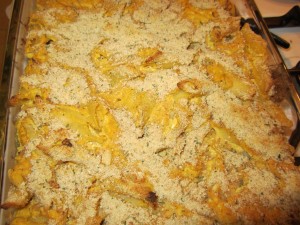
  7. Sprinkle breadcrumbs on top.
  8. Bake for about 35 minutes.

ENJOY!

Read Full Post »

Spaghetti Squash

In just about every October issue of all the magazines I get, fall squashes were a feature.  I love butternut squash already, but hadn’t ever eaten spaghetti squash.  After some research I was very intrigued – squash that is just like pasta, insane!  But really, it’s awesome.  I have already made it three times.  It’s a more flavorful alternative to pasta, not to mention has tons of vitamins and less calories.  And it’s in season, and should keep for 2-3 months, so stock up now!

When figuring out how exactly to roast this sucker, I stumbled upon a great tutorial with lots of photos, which I used as a guide.  I only roast things in the oven, so I used that method.  Seriously the hardest part about this is cutting that thing in half… once you have that outta the way, you’re golden.

What you need:

  • Spaghetti Squash
  • Olive oil
  • Salt and pepper
  • A really sharp and sturdy knife

What to do:

  1. Preheat the oven to 400
  2. Rinse off the squash and dry it well.
  3. Get out your big knife and begin to CAREFULLY slice the squash in half, longways.  This may take some time and muscle.
  4. Once you have two halves of squash, scoop out the stringy seed goop with a spoon.
  5. Cover in olive oil and salt and pepper, then place skin side UP on the baking sheet and pop in the oven for about 35 to 40 minutes.

    Covered with OO and S&P

    Ready to roast

  6. When it’s done in the oven, let it cool for a few minutes, then grab a fork, a sturdy bowl and a pot holder.  Place one half of the squash in the bowl and hold with one hand with the potholder, so you don’t burn yourself.  Simply drag the fork through the meaty part of the squash and you will see that it begins to come out and it really does look like spaghetti!  Do it until all you have left is the shell of the squash.
  7. Continue with the other half, then season with sauce, or more olive oil, or whatever you like!

Read Full Post »

I sincerely apologize for being so absent lately, but I will make it up by posting TWO times today. First off, roast bone in chicken w/ veggies.  Very easy, and very delicious.  I hadn’t ever roast any bone in chicken before, but I had some leftover bone in breasts in the freezer after my disaster trying to make fried chicken (seriously, it was a disaster).  So I googled ways to prepare bone in chicken and came across this post .  I tweaked it very slighlty and it turned out REALLY great.  Here’s how to do it:

What you need:

  • 2 skin on, bone in chicken breasts (or any skin on, bone in chicken parts would work, I’m sure)
  • 1 lemon, sliced (more lemons if you are making more than 2-3 pieces of chicken)
  • 1 teaspoon of salt
  • 2 tablespoons of fresh thyme
  • Garlic; I probably used 6-7 cloves of garlic, already minced
  • Black pepper and salt
  • Olive oil for drizzling
  • 1-2 tablespoons butter (optional)
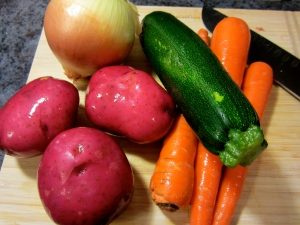
  • Whatever veggies you want to roast (carrots, potatoes, butternut squash, onions are all great for roasting)

What to do:

  1. Preheat the oven to 400
  2. Clean and chop the veggies.  Spread out on a baking sheet or in a roasting pan.

    Look at these gorgeous colors!

  3. Drizzle veggies with olive oil and sprinkle generously with S&P.
  4. Get out a cutting board and a muddler (if you have it, if not a knife will do).  If the garlic and thyme aren’t already chopped up/ minced, do that now.

    Ready to combine

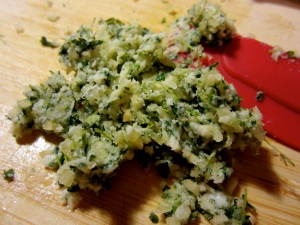
  5. Muddle the salt, garlic, thyme and butter together to make a paste.

    Paste

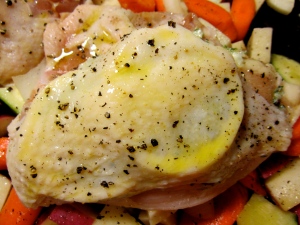
  6. Pull back the skin on the chicken and rub half the paste on each breast, under skin.  Then stuff with the sliced lemons.
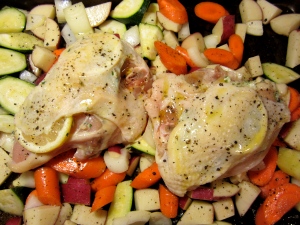
  7. Place chicken breasts on top of bed of veggies and drizzle olive oil onto chicken.  Top with S&P.
  8. Pop it all into the oven for about 25 minutes.  Be sure to let the meat rest for a few minutes after it comes out of the oven, as always.
  9. Enjoy!

Read Full Post »

Oh, if only pasta started with a B!

Tis the season for squash and pumpkins and all of these lovely things.  The great thing about the big squashes (like butternut, acorn, spaghetti, etc) is that you can buy them now while they are on sale and they will keep (as long as they are stored in a cool place, much as you would store a bag of potatoes) and use them later.  I bought a ton and used some butternut for this recipe, and decided to save the rest for butternut squash soup when it gets a bit more chilly and fall-like here in San Diego.

This is a super easy thing to pull together for a weeknight dinner.  It can be especially quick if you cut up the squash, onion and bacon before hand… When I have a lot of chopping to do I like to do it all at once on Sunday or Monday night for the whole week.  Then I pack everything that goes in one meal in a tupperware, then on whatever given day I just pull out the container and hit the ground running.  Also, in situations like this one, the bacon can start flavoring the onion and butternut squash in advance, while sitting in the fridge.

Besides b-nut (and bacon, if you aren’t obsessed like I am), you should have all of the ingredients on hand, and there are only three main steps (chop, roast, cook pasta)!

What you need:

  • A smallish butternut squash (unless you are feeding more than 3-4 people)
  • bacon, I used 4 really thick cut strips, but I would use 6 next time.  So 9 normal strips would do the trick
  • 1 onion
  • olive oil, salt and pepper for roasting
  • 1 cup or more shredded parmesan cheese
  • 8 to 12 oz of pasta

What to do:

  1. Preheat the oven to 400 degrees
  2. Peel and chop up the butternut squash into 1-2 inch chunks.  Chop up the onion and bacon into 1 inch pieces.

*Quick tip: if you have a sap problem after you cut up the squash – use a pumice stone to get it off your hands.  Works like magic!

  1. Put all the chopped components on a large baking sheet and spray or drizzle olive oil on top, enough to lightly cover most pieces.  Then season generously with salt and pepper.  Roast for 30 – 40 minutes, checking after 30 to see the progress.

Ready for roasting!

  1. While the squash and bacon are roasting, get your water a-boiling for the pasta.  When there is about 10 minutes left on the clock for the oven, start cooking the pasta.  When it’s ready, strain out the water (reserving one cup) and return to the pot.
  2. When the squash, bacon and onion are done, throw them in the pot with the pasta.  Add in the parmesan cheese and stir it all together.
  3. If you want it to be more liquid-y, add in some of the reserved pasta water and a dash of olive oil.  Top with more cheese if you like.
  4. Enjoy!

Finished product

Read Full Post »

I have been exploring the blog-o-sphere a lot lately, and have found some great new food blogs!  Today’s post comes from my favorite new food blog, Lottie + Doof.  I was inspired by and adapted his recipe for asparagus with butter and soy.

This is a really simple recipe.  All you need is asparagus, olive oil, S&P, soy sauce and fresh eggs.

I already had the oven on making some baked red potatoes in preparation for this wonderful side dish:

red smashed potatoes with butter and bleu cheese

So I thought, why not save a few pots and just roast all this asparagus while I am at it.  Another contributing factor is that I had way too much asparagus to be sauteing in a pan, even my biggest wok (read: haven’t eaten my fresh asparagus for two weeks now…).  So I roasted these suckers the way I always do – sprayed with TJ’s olive oil, sprinkled with sea salt and fresh ground pepper.  This time I added a very generous amount of soy sauce, sprinkled all over the top.  It was at least 4 tablespoons (but also keep in mind that I had two large bunches of asparagus).  Then I baked at 400 (only because that’s what I had the oven on for the red potatoes) for 15 minutes.

Then I began my very first egg poaching experience.  While I deemed it successful, I am considering buying an egg poacher, simply due to the fact that I would like to be able to make more than one at a time.  Or maybe I will just use a shallow, wide pan instead.  At any rate, I was researching methods and came across two tips that I employed.

  1. Add rice wine vinegar to the boiling water
  2. Use a mason jar ring to contain the egg while it is poaching (put the ring in the pot first, then pour egg on top)

Look at me, poaching eggs!

After successfully poaching 4 eggs and roasting more asparagus than I could ever imagine eating, I plated this dish, and added a teeny, tiny bit more of freshly ground pepper.

HOW FANCY!

Except as soon as I tried to cut mine up I realize I forgot to snap the ends off the asparagus!  Don’t forget to do this — it really sucks if you do.  Otherwise, it was fantastic.  Much like the commenters on the original recipe at L+D, I would have never put these flavors together, but am SO GLAD that I decided to try it out.  As mentioned, I served it with also-really-needed-to-be-used red potatoes, but I think you could get really creative with what to serve with this dish.  It can be breakfast-y or brunch/lunch, or dinner, as we enjoyed it.

OH – and did I mention that I finally got a new camera?  Look at all the (mostly ridiculous) crazy settings it has:

Fisheye – LOL

Miniature (for photographing quaint things?)

Toy camera (or hipstamatic rip-off)

BRIGHT colors!

Hope you enjoy!

Read Full Post »

So maybe this is a quiche type thing, or a frittata?  I dunno, I just know that I love breakfast for dinner.  And after visiting a local place for brunch and having one of the most delicious “omelets” ever, which was baked in a mini cast iron skillet, I HAD TO TRY IT.

This is insanely easy — I didn’t look up any recipes, just kind of did what I thought would work best. This is also really great because it’s kind of kitchen sink, throw in whatever you want/ have/ need to use and still have a delicious meal.  For example, I had a leftover baked potato that I cut up and threw in.  You really should have eggs, cheese and some veggies at all times in your kitchen, so just do what feels right.  Other things to try: sausage, tomatoes, onion, pesto, other kinds of cheeses, olives, ham, zucchini or squash, peppers, etc.

First I started pre-cooking some delicious, delicious bacon in the cast iron skillet (here is the skillet that I have and highly recommend, btw).  Oh, and preheat the oven to 425!

Frying the bacon

As you can see I used five pieces, but there are incredibly thick.  If you have normal cut bacon, maybe bump it up to 7.  But as I said earlier, you can just throw whatever you want in!  The great part about the bacon though, is that now you have delicious fatty grease to saute veggies in AND it’s a spectacular way to season and coat your skillet so that you can actually get the omelette out of the pan later and eat it.

While the bacon is a-cookin’, it would be a grand idea to clean and chop your delicious veggies.  I used broccoli, scallions and some spinach.  I only used half the broccoli, but all the spinach (about an oz) and all of the scallions, chopped.

Veggies!

I also whipped my eggs with shredded mozzarella cheese, salt, pepper, and milk while waiting for the bacon.  I used 8 eggs, about a cup of milk (maybe less?  I just poured some in, it was not more than a cup for sure), generous amounts of pepper and about half as much salt.  If I had to guess, I’d say a teaspoon or more of pepper.

Scrambling eggs

Finally the bacon was done, I took it out and wrapped in a paper towel to absorb some of the grease.  Then I threw in the scallions and maybe 8-10 minced cloves of garlic to saute for a few minutes on medium.  While it was sauteing, I went ahead and chopped up the bacon.

Sauteing garlic and scallions in bacon grease

Before I added the other veggies, I made sure to coat the sides of the skillet with the bacon grease.  I did this buy just taking a wooden spatula full of scallions/ garlic/ grease and running it all over the inside of the skillet a few times.  Then after the garlic turned a bit dark, I added the other veggies to cook for about 5 mins (or until the spinach starts to wilt, if you use it).

pre-cooking all veggies in bacon grease

Next I poured the eggs in.  Stir the contents around a few times, to make sure everything is evenly distributed.  Then I added more mozzarella on top!

Ready to bake

I let the whole thing cook on high for 7 – 8 minutes, until the eggs were more or less set.  Then I stuck that sucker in the oven.  As for the baking time, I had intended for it to bake for 15 – 20 mins… which after being extended in intervals of 5 mins eventually added up to about half an hour.  Bear in mind, I had an extremely DEEP skillet very, very full.  Not only was I starving by the time it was cooked throughout, but I had also sustained a very painful oven burn…. WAH.

All done!

I think it was worth it, though…

Like a breakfast pie

It was seriously delicious, you guys.  Also filling… we only ate about half and remember that one half of “we” is a giant (not me).  I served it with simple toast.  I wanted to make cheddar drop biscuits, but the lazy took over instead.  When I had the version that inspired me at Cafe 21, it was complemented by the most delicious potato pancake I have ever had in my life.  A good, easy substitute are the frozen ones at Trader Joe’s… plus, you already have the oven on, anyway.  Enjoy!

Read Full Post »

Older Posts »